Tmux fun
As my number of services piles up, I’m starting to repeat the same step of connecting to my VPS and on different user every day.
I want to try and automate that, so I can create multiple sessions on the different servers I have
For now I’m only on a single host, but I have 3 services (httpd, proxy and monitoring) to handle, and I sometimes want to switch back to a sudo user so I can restart docker daemon
Let’s use Tmux to handle the different sessions, and tmuxinator to template it !
Tmux cheatsheet
Tmux is a terminal multiplexer an alternative to GNU Screen . In other words, it means that you can start a Tmux session and then open multiple windows inside that session. Each window occupies the entire screen and can be split into rectangular panes. With Tmux you can easily switch between multiple programs in one terminal, detach them and reattach them to a different terminal. Tmux sessions are persistent, which means that programs running in Tmux will continue to run even if you get disconnected.
All commands in Tmux start with a prefix, which by default is ctrl+b.
The main commands to remember are detaching session (how to pause tmux), switching to next window or pane:
1
2
3
4
5
ctrl + b + d                  detach session

ctrl + b + n                  next window

ctrl + b + arrow_key          next pane
For more, check out the cheatsheet
Let’s create (or add) to ~/.tmux.conf the ability to scroll up/down on our pane and have some nice terminal olors:
1
2
3
$ cat ~/.tmux.conf
set -g mouse on
set -g default-terminal "screen-256color"
Tmuxinator
Since we will be repeating the same command to create session/window/pane, let’s use a template script called tmuxinator
After using it, I really like the configuration file, but I hate installation/documentation parts. It’s messy.
Don’t forget to set up $EDITOR variable in your .bashrc
1
export EDITOR='vim'
Template for binsh.io
Let’s use it on a current project I’m working, hosted on a VPS on OVH
I want to connect through SSH with 2 differents users:
- produser - applicative user, running several docker containers
- centos - default sudo user, running docker daemon
Let’s create 3 panes on produser (one for each service), and 2 on centos
Our template file looks like this:
1
2
3
4
5
6
7
8
9
10
11
12
13
14
15
16
17
18
19
20
21
22
23
24
25
26
27
28
$ tmuxinator new VPS_OVH
$ tmuxinator open VPS_OVH
$ cat .config/tmuxinator/VPS_OVH.yml | grep -v "#"
name: VPS_OVH
root: ~/
on_project_exit: tmux kill-session -t VPS_OVH
windows:
  - produser:
      layout: main-vertical
      panes:
        - produser_1:
          - ssh produser@vps.ovh
          - clear
        - produser_2:
          - ssh produser@vps.ovh
          - clear
        - produser_3:
          - ssh produser@vps.ovh
          - clear
  - centos:
      layout: even-vertical
      panes:
        - centos_1:
          - ssh centos@vps.ovh
          - clear
        - centos_2:
          - ssh centos@vps.ovh
          - clear
A few things to consider:
- When we detach from the session, we kill it, we do this to ensure we dont forget and create dozens of session. I don’t see any use case for disabling this.
- We connect to each session and clear the terminal, to not have any text remnants from our local terminal
- The host target is a DNS entry I set in /etc/hosts with the VPS IP
We could easily automatically generate this type of template for more VPS, for an entire subnet, etc.
Then, we add an alias to start the tmuxinator project, as we dont want the hassle of remembering the exact command
In our .bashrc
1
alias vps-ovh='tmuxinator start VPS_OVH'
And now we can just connect to our VPS by typing the command
1
2
3
4
5
6
kali@kali:~$ tmux ls
no server running on /tmp/tmux-1000/default
kali@kali:~$ vps-ovh
[detached (from session VPS_OVH)]
kali@kali:~$ tmux ls
no server running on /tmp/tmux-1000/default
Here we notice how there is no tmux session before the command, and none remaining after detaching from it. It works as intended, nice.
And our tmux result:
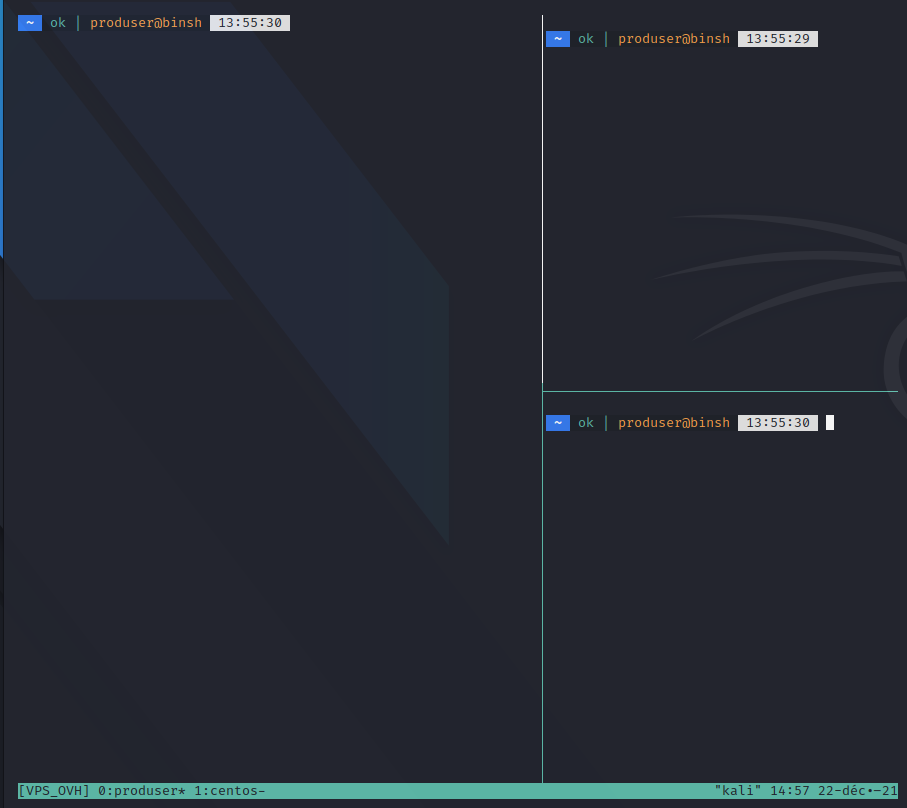
We can switch easily to the centos user by typing ctrl + b + n

All well
In the future, we might want to add more hosts / setups when we start getting more hosts. Maybe even add an automatic host fetch list